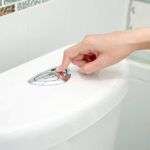
No one wants to deal with issues related to their toilet, and one of the most common is also one of the most frustrating: The toilet simply won’t flush. Especially when you’ve gone through a simple checklist for minor issues that might be the cause, such as plunging the toilet to remove clogs for instance, and haven’t resolved the concern, this can be a frustrating issue.
At Action Plumbing, Heating, Air & Electric, we’re here to help with a variety of toilet repair needs, including for toilets that just won’t flush no matter what you do. We’ve seen every issue that might lead to a toilet flushing problem, and we know what to do to handle it. Whether on your own or with the assistance of our plumbers as-needed, here are some of the steps that should be taken to determine the cause of a non-flushing toilet, plus what can be done once the problem has been identified.
Concealed Clogs
As we touched on above, clogs are perhaps the single most common cause of toilets that won’t flush. While toilet paper generally won’t cause issues here, other items can, such as children’s toys, small items of clothing, and more. If you have a concealed pipe below your toilet – meaning one that runs from the floor up through the wall – this is where clogs are most likely to be found. Of course, every toilet is different here, so what works for one might not work for another.
Generally, though, using a quality plunger – either a cup plunger or an accordion-style – is the best course of action. If you’re not sure which to use, ask our plumber as needed. In addition, if your toilet has a pop-up stopper at the top that needs to be lowered before using a plunger, do so by pushing it from its handle at the side or from below, not from the top. Otherwise, you run the risk of damage to the stopper and a broken seal between it and your toilet flange – which can be a costly repair.
Draining Toilet
If plunging doesn’t work after a few tries, you might need to try draining your toilet. Make sure it’s safe to do so by first checking the water level in your toilet tank. If it’s too high or is becoming too high, shut off the water supply to your toilet. The shut-off valve is generally located either directly behind and above it (this might be a knob where you can twist and/or turn), or along the wall next to the floor behind and below the toilet tank.
Once you’ve ensured it’s safe to do so, flush your toilet and hold the handle down. This will cause any existing water left in the tank or bowl to drain into the waste pipe below, which can help allow for better plunging when you’re done. To finish, turn the water supply back on and try flushing again.
Toilet Tank
If that fails, you might have to remove the toilet tank itself. First, disconnect its water supply line at either the valve behind and above it or by releasing it from the wall where it’s attached near the floor. Then, detach the tank from its bowl by lifting straight up. If you have any problems here, ask our plumber for assistance.
Once the tank is out, you can try using an auger to clear any clogs in the waste line or by removing the one-way valve in the toilet’s supply line to see if that helps move things along. Keep in mind that it shouldn’t be removed if your system freezes in winter, however, as doing so will make it impossible to refill your toilet tank in time for use.
Handle and Chain Mechanism
Another possible issue that can be identified when lifting your toilet tank is the handle and chain mechanism that runs between the tank’s handle and flapper valve. If this sight causes you to see corroded metal or other signs of wear, it might be time to replace it with a new one. To install replacement parts, refer back to your owner’s manual for guidance, or just ask our plumber as-needed.
Flapper Concerns
The flapper is an inlet valve that’s responsible for moving water from the tank into the bowl of your toilet, but it may have worn out. If its chain is stretched, corroded, or broken, it might not move properly to open and close the flapper when needed. This can be cause for concern if you notice water leaking from the tank into the bowl below while your system is in use.
If you choose to replace a flapper on your own, be sure you turn off the water to your toilet by first shuttering the one-way valve until it’s completely closed. Then, use a wrench to remove its handle and/or screw cap to access the flapper inside. From there, you can simply put the new part in place of the old one, then adjust its position as necessary before replacing its handle or screw cap.
Overflow Tube
Finally, in some cases a cracked or otherwise damaged overflow tube can cause your toilet not to flush properly. This is due to the fact that the tube drains excess water from your tank in case it doesn’t get moved into the bowl, which can keep your system from overflowing onto the floor if you have a leaky flapper or other internal issue.
If this sounds like what’s going on with your toilet, just replace the broken overflow tube with a new one that’s been designed to fit your specific toilet. If you need help finding the proper part, just ask our plumber for guidance as-needed.
For more on how to handle flush-related plumbing issues in your toilet, or to learn about any of our plumbing or HVAC services, speak to the staff at Action Plumbing, Heating, Air & Electric today.


